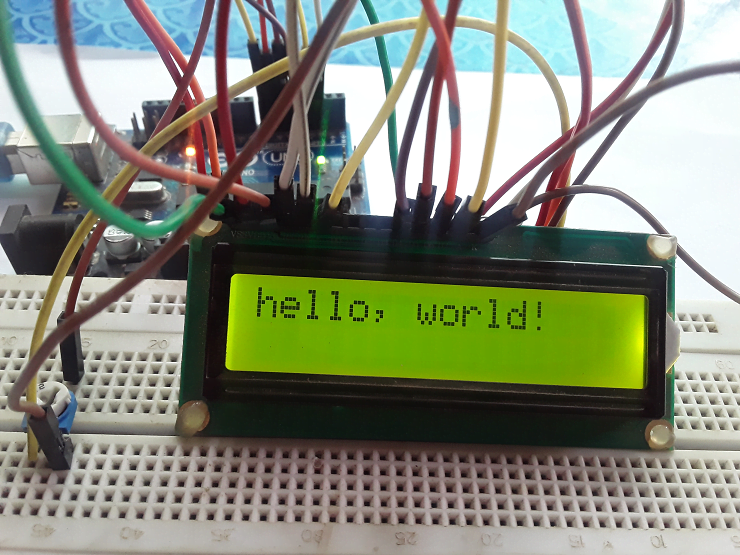
HOW CAN INTERFACE 16X2 LCD DISPLAY WITH ARDUINO
This display is a communication medium. The display is used to show the data of the sensor. Or else a device is commanded by a display to perform a particular function. You will get to see the use of the display in the devices. Like Owen, printer machine, dispenser machine etc. In this article we are going to interface 16x2 LCD display with Arduino Uno and will show some text on the 16x2 LCD display with simple Arduino example code.
INTRODUCING 16X2 LCD DISPLAY
The 16x2 LCD (Liquid Crystal Display) display is an electronics module. Which used to display data from the sensors. It consists of 2 rows and 16 columns total 32 characters can be show in this 16x2 LCD display and each rows and columns are of 5x8 pixel. And tis display can be capable 224(ASCII Code) types of symbols. And many variants of LCD display are available in the market like, 16x1, 16x2, 20x4, Nakia oiled etc.
COMPONENT REQUIRED
- Arduino Uno With cable
- 16x2 LCD display
- 10k preset
- 540 Ohm resistor
- 9V Battery
- Breadboard
- jumper wire
CIRCUIT DIAGRAM
you follow the circuit diagram given below. They are both same. These are same to connection of both circuit .
The whole circuit is given 5V to operate from 9V battery. Here VCC (+) wire of 9V battery is connected to Vin pin of Arduino and 5V pin of Arduino is connected to VDD pin of LCD and left side terminal of 10k preset and one end of 540 ohm resistor. And battery GND is connected to Arduino GND pin and VSS, RW, and K pin of LCD and GND is connected to right side terminal of 10k preset.
INTERFACE 16X2 LCD DISPLAY TO ARDUINO UNO
In this project. you can see. Given above circuit diagram. How have interfaced 16x2 LCD display with Arduino Uno. Now you will have to install LCD display library in the Arduino ide. Open the Arduino ide click on sketch>go to the> Include library>and go to the >manage libraries> and write liquid crystal on search box and enter. You will see the 1st liquid crystal library in front. You have to install that library. When that installed library. Now you have to create the new file and copy the all example code given below and paste the code on your new file and after you connect the Arduino Uno board, upload the code from Arduino Ide.
CODE
#include <LiquidCrystal.h>
int rs = 2;
int en = 3;
int d4 = 4;
int d5 = 5;
int d6 = 6;
int d7 = 7;
LiquidCrystal lcd(rs, en, d4, d5, d6, d7);
void setup()
{
lcd.begin(16, 2);
lcd.print("hello, world!");
}
void loop()
{
}
RELATED POST:-


0 Comments