
LED BLINK ON ARDUINO BOARD WITH SIMPLE ARDUINO PROGRAMMING
Abhiyanta Prayog Shala About:-
Hello friends! First I Welcome all of you to the "ABHIYANTA PRAYOG SHALA".This is my 1st Led blink programming projects on Arduino board .If you are in school or college or then you have graduated complete or not graduated. Doesn't matter!.If you like technology or then want to pursue a career in Embedded field or you also want to learn like!you want to do Automation or want to learn to make Drone,Robot,IOT,PCB design or any embedded projects wants to learn and make .So Guys.This blog for you!.All my articles are coming.You will get a lot of help in those articles.When you will work on Technical Projects.

WHAT IS ARDUINO?

WHY USE OF ARDUINO?

especially for architecture design prototypes of device and educational fields so on.and Arduino community is very huge.If you create a projects and if thee problem gates in that projects,then this community will help you more and more to remove the problem and give solution.And the Arduino platform is absolutely free for us.And Arduino is not very expensive and therefore available in the market,online store."That's why Arduino should use?"
WHAT IS ARDUINO BOARD?
Arduino board is a CPU.Which consists of a single chip.To which we speak micro controller by uploading the program to the micro controller and this can be brought under control by connecting the devices by creating the desired input,output to this pin .
TYPES OF ARDUINO BOARD
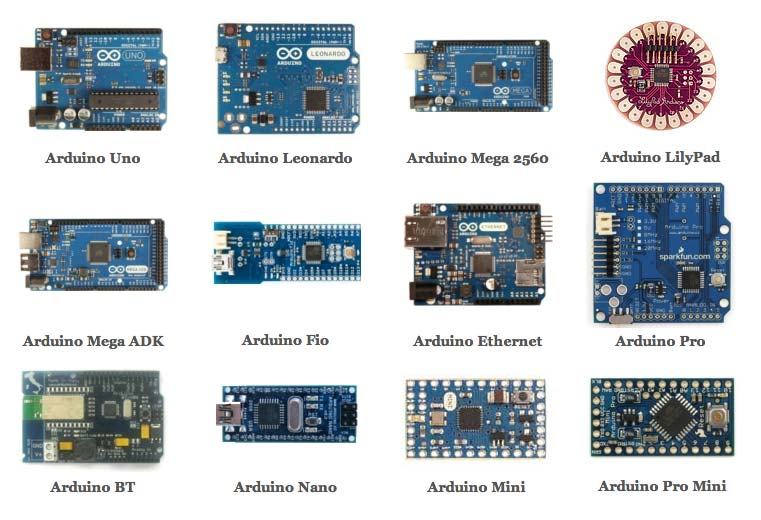
Arduino has a lot of variety available in the market, such as the Arduino mega,Arduino Uno,Arduino nano,Arduino Mini,Arduino Pro Mini,etc.If you need more inputs and outputs pins then Arduino mega can use.And if you need few more pins then Arduino mini can use.But is the most popular of this board,Arduino Uno Board.
WHAT IS ARDUINO Uno BOARD?

Arduino Uno board is complete set of electronics.There are 28 pins of Atmega328 micro controller
on the Arduino Uno board.Atmega328 Micro Controller has a memory of 32 kb,which is enough to make a lots of projects.
LED BLINK USING ARDUINO

Suppose take a led and we want this led to be turned ON for one second then OFF for one second. So the first you have to do is downloaded Arduino IDE on your pc or leptop or your smartphone.After install Arduino ide.
COMPONENT REQUIRED:-
1.Arduino Uno Board and Arduino Usb Cable2.Led3.1K Resistance4.Some Male, Fimale wire
CIRCUIT DESCRIPTION:-

CODE:-
int Led =2;
void setup()
{
pinMode(Led, OUTPUT);
}
void loop()
{
digitalWrite(Led, HIGH);
delay(1000);
digitalWrite(Led, LOW);
delay(1000);
}
CODE DESCRIPTION:-
int Led = 2;
First of all take a int type Led variable then asign or store.Arduino pin number 2 to the int Led.
void setup()
{
pinMode(Led, OUTPUT);
}
Then select the pinMode of Arduino pin on the void setup.Arduino pin has to keep output or keep input Arduino pin number 2 is created output. Here becoz Led is output component.So by using the pinMode function here.
void loop()
{
digitalWrite(Led,HIGH);
delay(1000);
digitalWrite(Led, LOW);
delay(1000);
}
So finally on written instruction in the void loop body and continuously program run in the loop function.
digitalWrite(Led, HIGH);
Here using the digitalWrite function has HIGH it means Arduino's pin n. 2 is high
so we know that our led is already connected to pin n. 2 of Arduino so led is glow,.
delay(1000);
Delay means hold the program for 1 second it means our led is glow only one second then led of for 1 second.
digitalWrite(Led, LOW);
And Then this instruction means Arduino pin n. 2 is Low That means Led is off for 1 second using delay function .In this way, the programs written in the void loop will continue to run one by one...


0 Comments