
ARDUINO-TOUCH SENSOR | TACTILE SENSOR

In this article. I will tell you about Touch Sensor with Tactile sensor technology. What is Touch sensor?, How does it works?, And How can interface with Arduino Uno. And we are going to make a simple Automatic touch based led on and led off by Touch sensor. And all touch sensor related topics will cover.
WHAT IS TOUCH SENSOR?

Touch sensor is types of electronics switch sensor. Which detects physical contact through the Touch sensor. And controls devices or loads. It's also known as Tactile sensor.
Nowadays touch sensor is using a lots for different-different applications. Today touch sensor is being used in the touch screen display, touch panel, robotics, homes, offices, and in the industries...etc. This sensor is being used to home appliance instead of mechanical switches. Touch sensor is good choice home appliance or any other sectors because it's very small size and compact, low coast, less power consumption and fast responsive and also less maintained because there is no movable part in this sensor. This sensor is very powerful sensor, because when subject touches surface on the sensor, the touch sensor take fast response as compare to mechanical switches.
HOW DOES TOUCH SENSOR WORKS?
We know that Touch sensor detects physical contact and control devices or loads. But we don't know how does sensor works?
When there is not touch apply surface on the touch sensor. So touch sensor act as Switch OFF. It's mean there is no current flow in circuit of touch sensor. And No signal send to Arduino or any controller circuits.
And then When there is touch apply surface on the touch sensor. So touch sensor act as Switch ON. It's mean there is current flow in circuit of touch sensor. And signal send to Arduino or any controller circuits. And take action...
TYPES OF TOUCH SENSOR
There are two types of touch sensor
- Capacitive Touch sensor.
- Resistive Touch Sensor.
Capacitive Touch Sensor:- Capacitive touch sensor is highly used to portable devices like smart phone, i pad, computer, laptop, atm, home appliances, automotive and also robots. Capacitive touch sensor is measuring change electrical charges in capacitance. There is an electrode film on the above of the glass panel that is conductively coated with printed circuit pattern around the outer area.
Resistive Touch Sensor:- Resistive touch sensor is measuring to apply pressure or force, surface on the touch sensor. It consists of two conductive layer and a non conductive layer. When apply the pressure to the conductive layer sensor. So drop voltage and compare the voltage from comparator ic and then send signal to microcontroller or any other controller circuits. Resistive touch sensor is used to gamming platform, instrument, mp3 Player, and also keyboard etc..
PINOUT OF TTP229 TOUCH SENSOR

It has 3 pins in the touch sensor.
VCC - 5V DC provide to VCC pin of Touch sensor.
GND - Ground provide to GND pin of Touch sensor.
SIG - Signal provide to SIG pin of Touch sensor.
COMPONENT REQUIRED
- Arduino Uno.
- TTPP239 Touch sensor.
- Led.
- 1k Resistor.
- Buzzer.
- 9V Battery.
- Bread board.
- Jumper wire.
SCHEMATICS DIAGRAM

CIRCUIT DIAGRAM
You have to follow this circuit diagram or schematics diagram and make your own project.

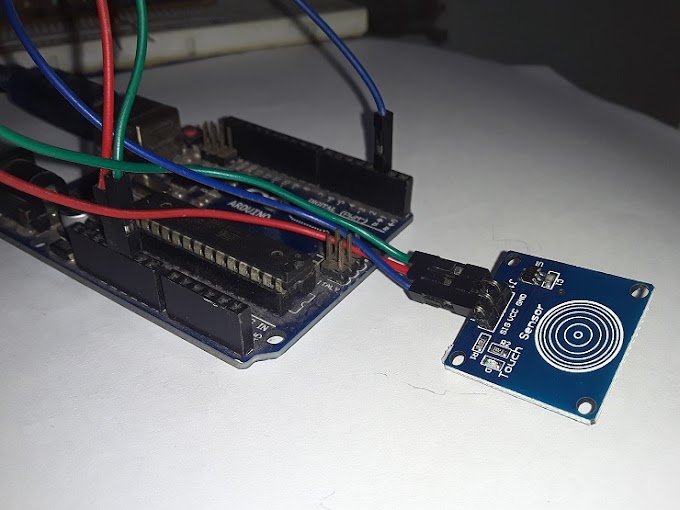
TOUCH SENSOR INTERFACE TO ARDUINO UNO
In this article we will read data from the touch sensor. When we will pressed their surface on the touch sensor. The led and buzzer will ON and when we will not pressed their surface on the touch sensor. The led and buzzer will OFF.
TOUCH SENSOR - ARDUINO UNO
VCC - Connect VCC pin to Arduino 5V pin
GND - Connect GND pin to Arduino GND pin
SIG - Connect Signal pin to Arduino Digital pin(D2)
BUZZER - ARDUINO UNO
(+) Terminal - Digital pin (D3)
(-) Terminal - GND
LED - ARDUINO UNO
(+) Anode pin - With1k resistor connect to Digital pin (D4) (-) Cathode pin - GND
CODE
int touchPin = 2;
int buzzer = 3;
int led = 4;
int touchVar;
void setup()
{
// put your setup code here, to run once:
Serial.begin(9600);
pinMode(touchPin, INPUT);
pinMode(buzzer, OUTPUT);
pinMode(led, OUTPUT);
}
void loop()
{
// put your main code here, to run repeatedly:
touchVar = digitalRead(touchPin);
Serial.print("Touch Valu = ");
Serial.println(touchVar);
if(touchVar == 1)
{
digitalWrite(buzzer, HIGH);
digitalWrite(led, HIGH);
Serial.println("pressed!");
}
else
{
digitalWrite(buzzer,LOW);
Serial.println("Not Pressed!");
}
delay(500);
}


0 Comments